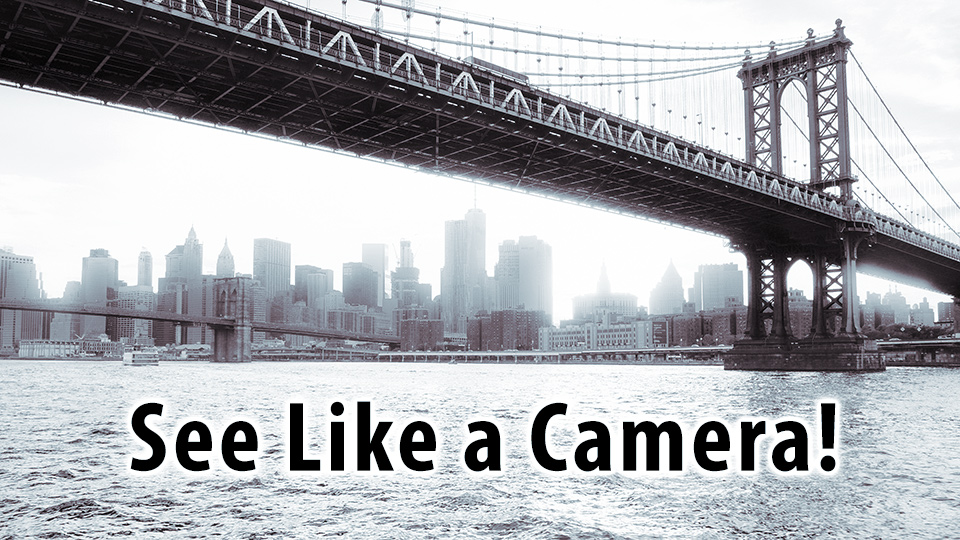
Don’t just pre-visualize—see the shot!
My “Re-Thinking the Raw File Workflow” post stirred up quite a storm of protest from photographers so thoroughly invested in a raw-file workflow that they missed the point of the whole post! So… consider this a clarifying post—I will be examining how using the Fuji Film Simulations in-camera helps the photographer see creatively whether they insist on shooting raw or take advantage of the high quality jpegs offered by the Fuji camera!
I have also posted a new video on the subject at the end of this post—scroll down to see it!
Make no mistake, there is a revolution brewing in photographic technology! One that has been percolating since the introduction of digital technology in image processing. The full impact of computer image processing on image capture has yet to be revealed, but there are glimpses of the disruptive technology to come. One has only to consider the iPhone, and the ever dwindling sales of point-and-shoot cameras to see the future of the big-glass DSLRs, and monster medium format cameras! The only question is how smoothly or how rapidly the transition will happen…
The mirrorless “revolution” is perhaps more of a transitional phase, but it is an important step in the march to the inevitable replacement of virtual image capture with computational imaging. The key element of the mirrorless revolution, or more accurately evolution ( because the mirrorless camera is still firmly in the virtual image capture camp,) is not the size and weight advantage of replacing the mirror, but the fact that the EVF (electronic viewfinder) is capable of providing a WYSIWYG experience of image capture! At the moment, nobody understands this better than Fujifilm, and the Fuji X-Pro 2 is currently the ultimate expression of the power of the EVF to inform one’s creative vision!
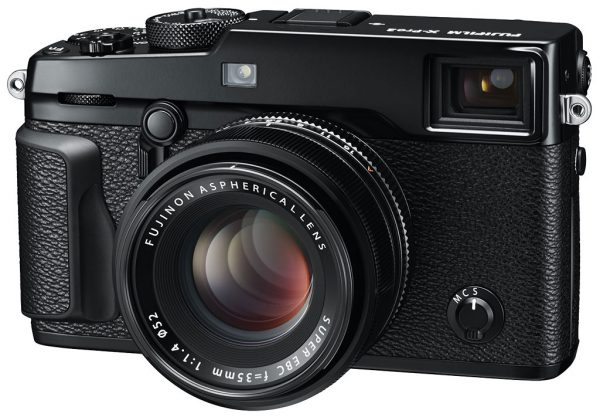
The new Fuji X-Pro 2 is currently the ultimate expression of mirrorless camera technology
I’m not going to bother to sing the praises of Fuji’s in-camera jpegs—you can read my older post , and view the video to see that—instead, I’m going to look at the creative application of the Film Simulations for shaping your photographic vision. It is obvious that the way the image looks on the LCD screen, on the back of the camera, impacts your decision making process in capturing images! Even though we’ve been advised not to fully trust that image, and instead “expose to the right,” use the histogram, etc…
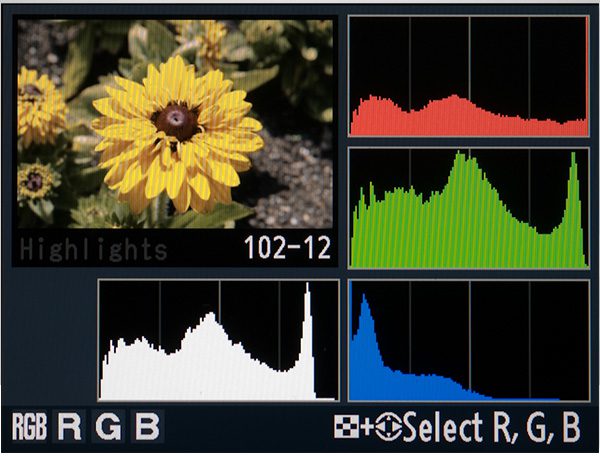
Check the histogram – shoot to the right!
Every photographer I know looks at the back of the camera, at the very least, after the first shot of a sequence, just to check and see if its close to what they had in mind! The EVF in the mirrorless camera offers a continuous experience of the “look” of that LCD without interrupting the image capture process. It is often hard for an experienced photographer to get over the habit of “chimping,” or checking the back of the camera, even though they already saw the image in more detail when they pushed the shutter release!
The mirrorless EVF offers a more or less exact preview of the “look” of the captured image with the current settings of the camera. Besides previewing exposure, most cameras can pre-set the jpeg capture to a few different picture styles like: landscape, portrait, vivid, and standard—the Fuji-X cameras provide a much wider range of Film Simulations, plus tone and contrast controls within those looks. This level of in-camera control is a tremendous aid to creative visualization because it allows you to see like the camera!
Here is a simple example: a raw, as seen by the eye, shot captured at the fish market in Dubai…

Fish market “cutter” in Dubai
if I had seen this in color in the viewfinder, I might have decided that the man in the red shirt, in the background, was too distracting. I might have moved to try and eliminate those men in the background and might have missed this great un-posed moment. This is what I saw in the Fuji X-Pro 2 EVF viewfinder…

Fish cutter in B&W Acros-G Film Simulation
Previewing the image in B&W obviously affects the creative choices you might make while taking the picture. Previewing the image as it might be creatively processed brings an important aspect of image creation into the moment of capture! This integrates image crafting with image capture—a fundamental change in the history of the photographic process! So…
Let’s take a look at those Fuji film simulations:
PROVIA/STANDARD
Fuji’s version of standard – Suited to a wide range of subjects, from portraits to landscapes. This is the default film simulation, and if you don’t change any preferences, this is what you’ll see in the EVF
Velvia/VIVID
Based on Fuji’s famous slide film emulsion – a high-contrast palette of saturated colors, suited to nature photos. This has extra saturation in greens, blues, and reds – perfect for landscapes
ASTIA/SOFT
Enhances the range of hues available for skin tones in portraits while preserving the bright blues of daylight skies. Recommended for outdoor portraits! This simulation renders very smooth color in skin, ideal for most portraits, but it also works very well for blue-hour landscape photos!
CLASSIC CHROME
Soft color and enhanced shadow contrast for a calm look. I think this is meant to simulate older professional slide film—not as saturated as Velvia, blues shift a little towards cyan, and it has more contrast (darker) in shadows.
PRO Neg Hi
Offers slightly more contrast than PRO Neg Std. Recommended for outdoor portrait photography. Less colorful than Astia, this is a good color-neutral rendering simulation that I think of as an alternative to PROVIA—just a bit less colorful with good contrast.
PRO Neg Std.
A soft-toned palette. The range of hues available for skin tones is enhanced, making this a good choice for studio portraits. A bit flatter than PRO Neg Hi, it doesn’t have the bright blues that ASTIA has, but is similar in contrast and maybe a little bit less colorful overall.
ACROS
Based on an old Fuji B&W film, takes black-and-white photos with rich gradation, and outstanding sharpness. It also has a subtle film grain simulation. Available with yellow, red, and green filters—these filters deepen shades of gray corresponding to hues complementary to the selected color. Yellow deepens purples and blues. Red deepens blues and greens. Green deepens reds and browns
MONOCHROME & SEPIA
These can be pretty much ignored—the sepia is like everyone else’s, and it just looks flat and dull brown. MONOCHROME is similar to ACROS without the sharpness and grain, so to my mind is less desirable.
All of these “looks” are different, and fairly sophisticated color and tone renderings that can be used to creatively alter the feeling in the image! In addition to these Film Simulations there are dynamic range, highlight, and shadow tone & contrast controls that can be applied in the camera settings to alter the image rendering in the EVF and the in-camera jpegs. Adobe also supplies decent versions of these Film Simulations in the Camera Calibration settings in Lightroom and ACR, so even if you prefer to spend time in post, you can still take advantage of the “looks” while you are capturing images, as a pre-visualization aid!
Shoot Mode Tone Control
The Fuji-X cameras have what they call “shoot modes” that can be used to alter the way the in-camera jpegs are processed. These can add significant value to your creative options, and pre-visualization during capture. The available options are:
- Image size & quality
- Film simulation
- Grain Effect
- Dynamic Range
- White Balance
- Highlight Tone & Shadow Tone
- Color, Sharpness & Noise Reduction
Some of these are obvious, but Dynamic Range, and Highlight & Shadow Tone deserve some explanation.
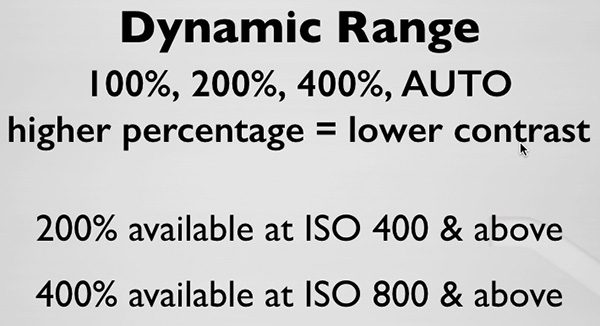
Dynamic Range
Dynamic Range is a global contrast setting which elevates the shadow values similar to the way you can using the Shadow slider in Lightroom/ACR – In practice its useful when shooting at higher ISO, where you are more likely to encounter high-contrast lighting situations.
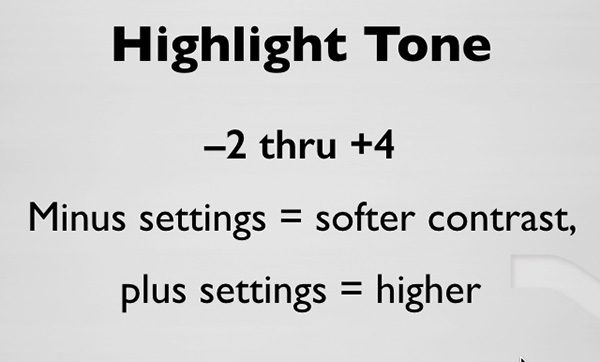
Highlight Tone
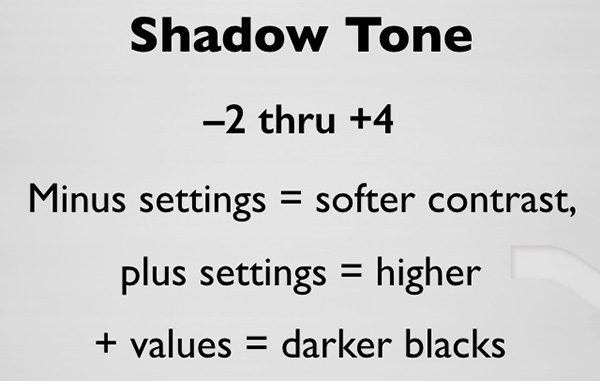
Shadow Tone
Highlight Tone and Shadow Tone offer control over the value (lightness or luminosity) AND the local contrast within their respective value ranges, so they operate in a subtly different way than the controls in Lightroom/ACR. Adjusting multiple Shooting Mode parameters is made easy with the Q menu on the back of the camera…
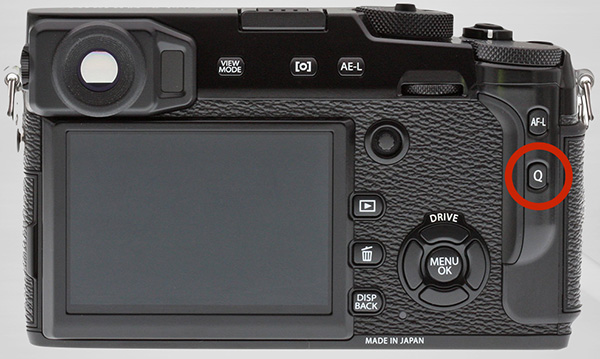
The Q button gives you access to the Quick Menu
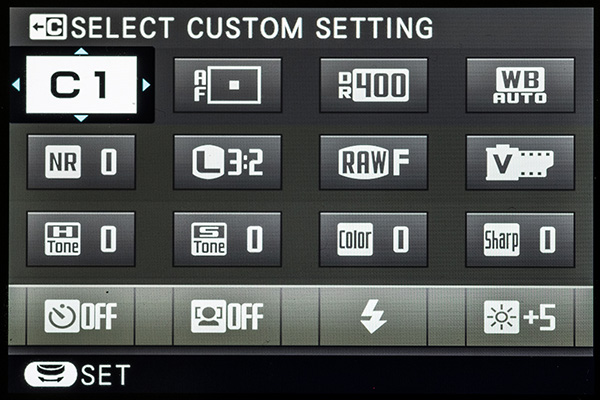
The Quick Menu
The Quick Menu allows for easy & quick adjustment of any of the shoot mode parameters, as well as the ability to select pre-set Custom Settings or collections of multiple parameters.
The In-Camera Shoot Modes in Practice
To take advantage of this new way of creatively seeing like the camera you need to set up your camera to shoot Raw + Jpeg, even if you insist on post-processing the raw files. If you only shoot raw, you will see the effect of the camera settings in the EVF, but you will have no reference for what you saw recorded in the raw file. Its like re-inventing the wheel—save your self the trouble and import the jpegs as well. Then at least you have a visual reference for what inspired you in the first place! Here is a sequence of images that illustrates the creative visualization process using in-camera settings to inform your vision…
I went on a boat tour around Manhatten recently, around sunset—a beautiful way to get shots of the New York skyline! The light was a little hazy, and I was using Velvia & a Shadow Tone of +1 to try and cut through the haze a bit.

Velvia w/Shadow Tone @ +2
But then I thought “what would happen if I enhanced the haze…

Velvia w/ Highlight & Shadow Tone @ -2, Color @ +1
So I set the Highlight & Shadow Tone to -2, and interesting things started to happen. I could lower the exposure just a little and dial up the color just a little to +1… the city took on a kind of glow…
While I was in B&W, I shot a lot of silhouettes into the sun, but as we approached this bridge, I thought…
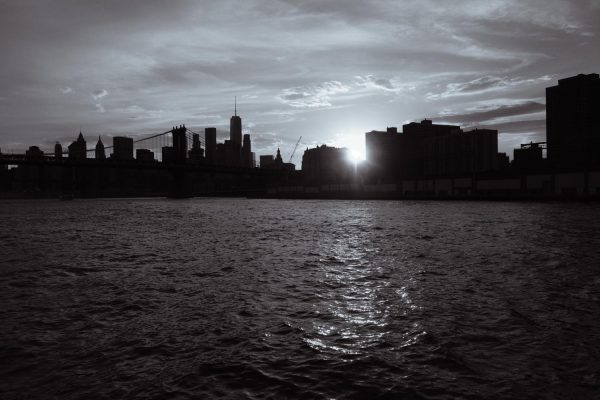
Acros – R w/Tone settings at zero
what if I really opened up and went for a softer rendering…
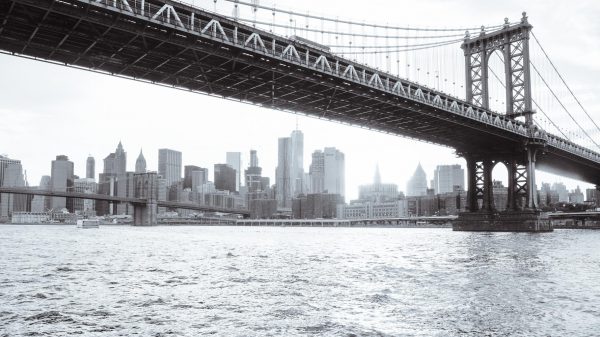
Setting the Highlight and Shadow Tone to -2, I saw this… and captured a bunch of images this way.
Setting the Highlight and Shadow Tone to -2, I saw this… and captured a bunch of images this way. Later… in Lightroom…
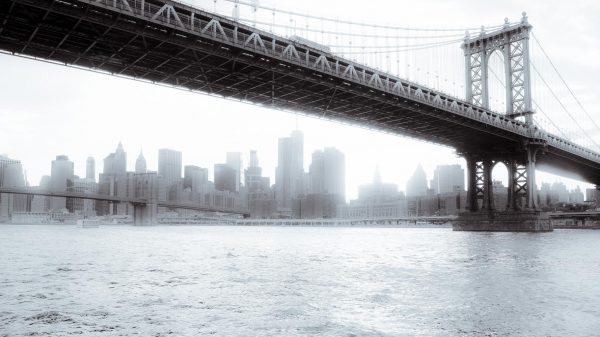
De-Haze with minus setting in Lightroom
I thought… why not really push the hazy dreamy look ! So I used the de-haze “effect” to add haze with a minus slider setting… Then I took both versions into Photoshop…
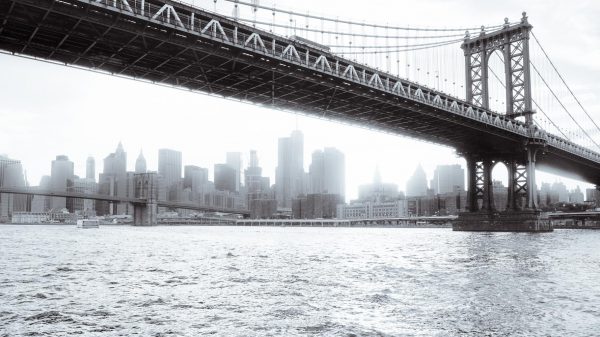
Blended version
…and blended it back into the sharper original so that only the skyline was fogged—this really pushed the more distant buildings back. You can see here that I am not advocating that it is unnecessary to use post-processing to enhance your images. But setting up the camera a certain way allowed me to recognize a creative interpretation at the time I was capturing. This provides a sort of creative feedback loop that enhances the photographic process!
I made another little video that examines the creative application of Fuji’s Shoot Modes in a little more detail:
Remember EVF=WYSIWYG=See Better with Fuji-X
