Jpeg is My Friend with Fuji X-Pro 2

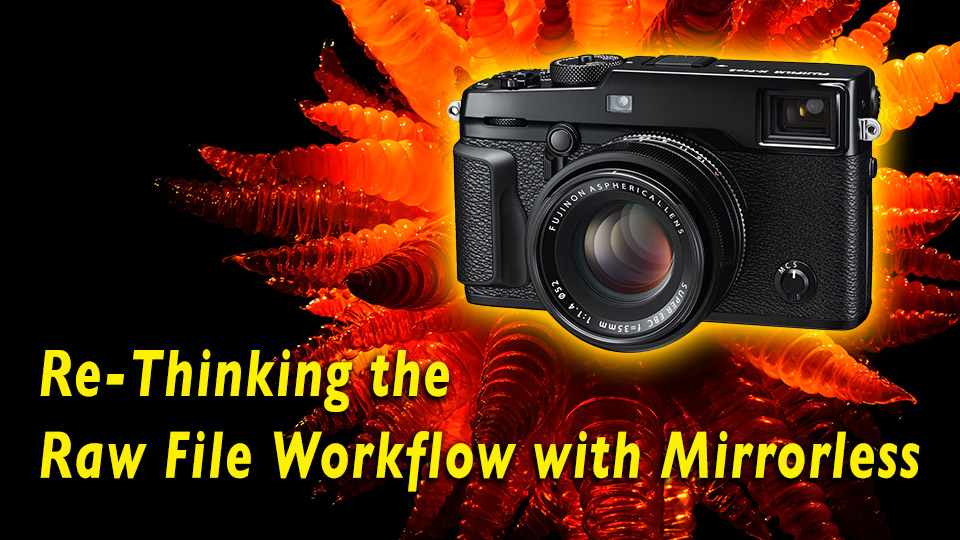
Its been a very busy month with travel, multiple workshops and a brand new Fuji X-Pro 2 to test! I’m finally getting a moment to post before we run out yet again. Today I’m going to be talking about how the mirrorless camera systems are changing the way photographers approach the photo workflow, and I’m suggesting that we can re-evaluate the traditional raw-file workflow.

I have a video presentation for this material here, though you can probably read through this post a bit quicker, and I have a gallery of more images at the end of this post:

Note: Since this video came out there have been many comments defending raw processing workflows, and specifically Adobe’s Fuji Film Simulations emulations—I have added a bit more info at the end of this post to address the various objections, though I must insist that I am not suggesting that anyone abandon Raw files entirely! Please read the post for actual meaning, and not to simply fuel your own prejudices!

Now, what I’m talking about here can apply to many mirrorless cameras, but I am most excited about the Fuji X system cameras and specifically Fuji’s latest camera, the X-Pro 2, which I feel is the ultimate expression of the mirrorless approach to photography today!
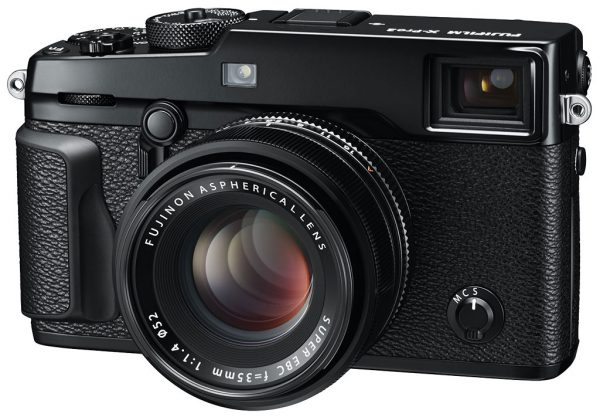
Fuji X-Pro 2

The new Fuji X-Pro 2 is currently the ultimate expression of mirrorless camera technology

Evolution to Revolution

Not really all about size and weight.

Fuji likes to call their mirrorless systems “Evolution to Revolution,” and they show this transition from a big heavy system to a small, light, all in one camera. But really, I don’t think the attraction of mirrorless is about size and weight!

The evolution of photo technology has been involved in three areas: (1) Pre-visualizing the image, starting with a groundglass or some kind of viewfinder, eventually settling on the DSLR approach reflecting off a mirror, giving you an optical image through the same lens that takes the picture. (2) Capturing the image on some receptive media, and (3) realizing the image, which has traditionally been a post processing sort of thing, developing film and making prints, finally becoming the image processing stage of digital capture.  Digital technology has impacted all of these areas, but basically has just substituted ones and zeros for silver salts and chemistry—the three areas of pre-visualizing, capturing, and realizing have still been treated as separate stages of the whole photographic process. Fairly early on, digital capture became all about the raw file – preserving that captured data, and processing it, after capture, to craft the best possible image.

While you could get an instant preview of the image on the little LCD screen on the back of the camera, we were all advised to not trust the LCD – I even told students they should tape over that little screen — the term “chimping” was coined as a derogatory for the process of continually checking the screen after the shot!
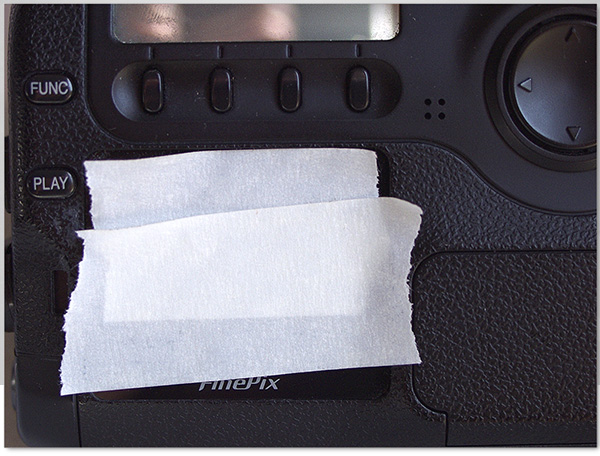
Don't Chimp!

Don’t Chimp!

We were all told to check the histogram to determine the correct exposure – shoot to the right, to get the best “data” – it became all about the quality of data, not the actual image! The image could be made better, later if you had the right “data” —for my part though, I have to tell you that I never sold a histogram, even a really good one, to a client!
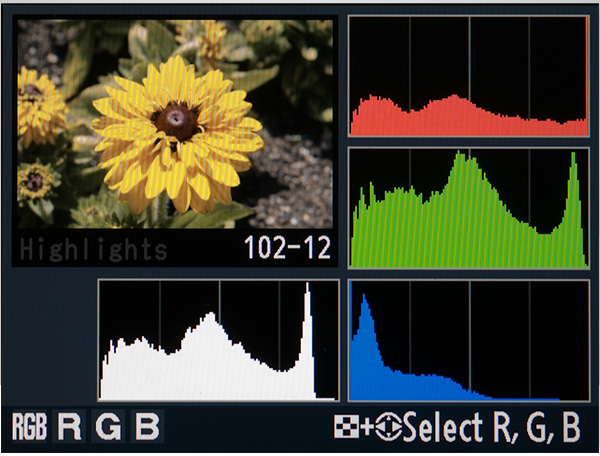
Histogram

Check the histogram – shoot to the right!

Now the mirrorless cameras have changed the equation in a way that integrates the three areas of pre-visualization, capture and realization by introducing the electronic viewfinder. This provides us with the opportunity for a “what-you-see-is-what-you-get” experience of capturing images. You don’t need to “check the back” to verify that you got the shot because you can now “see it” when you take it! This to me is the essence of the mirrorless “revolution.”
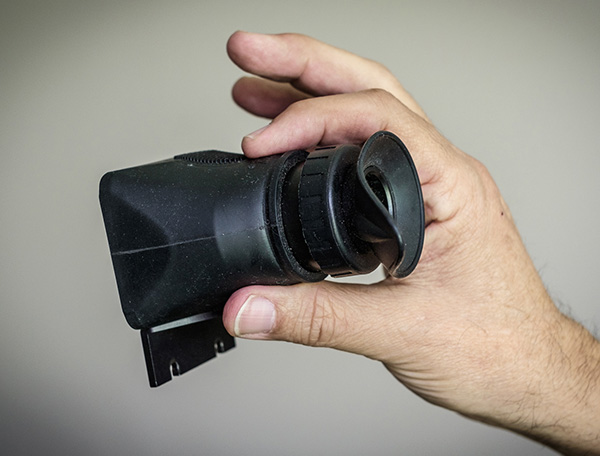
Loupe

You don’t need a loupe to check the back of the camera when you can see what you’re going to get in the EVF

I am also going to explore the notion that Jpegs are bad, in fact we will see that Jpegs are not “bad” at all. Now I know that this is a very difficult thing for most of you out there, but bear with me here because this is an important idea that can have great benefits for your photography! To see how this is possible, we are going to look at Fuji’s Film Simulations and Shooting Modes as creative ways to craft the image in-camera! But before I dive into all of this, as a preview, I will talk about my own journey to mirrorless convert.

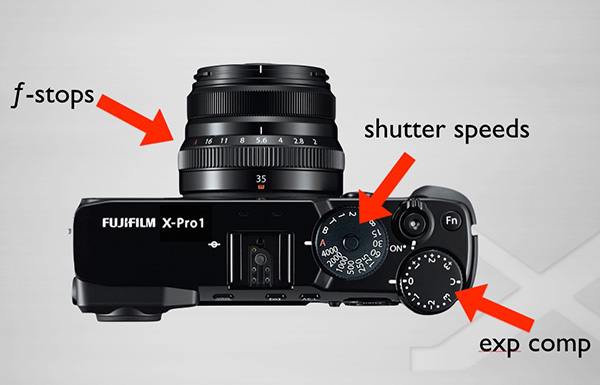
My first mirrorless camera was a Fuji X-Pro 1 , I was looking for a lightweight travel camera with interchangeable lenses for a trip to Italy—I just didn’t want to lug my Canon DSLR around. I was attracted to the Fuji because it had ƒ-stops on the lens, shutter speeds on a dial on top, and this handy little exposure compensation dial.
X-Pro 1

The retro design of the Fuji X-Pro 1 felt very comfortable!

The retro design of the camera just felt really comfortable for an old film camera user like myself! I knew how to work this camera the moment I picked it up! Oh, and this camera introduced the hybrid viewfinder which could give you an optical, rangefinder style image, as well as an electronic viewfinder. This was in keeping with my experience with DSLR systems where I was looking at an optical image, and I thought it would be an ideal marriage of the two technologies.  When I started shooting with it, I was still using my preferred raw file workflow- I shot RAW + Jpeg on my trip, and pretty much ignored the jpegs once the file format was supported by Adobe. For a few years afterward, I shot RAW only, bringing everything into Lightroom and processing the images there—I was happy as a clam! I loved working with the camera, though I ended giving up on the optical image in favor of the EVF for reasons that will become apparent in a minute…

Fast-forward to the present ; I recently upgraded to the new Fuji X-Pro 2, and this is when things started to change for me! I “saw the light,” as it were.. after I did my initial tests.
Fuji X-Pro 2 with 90mm

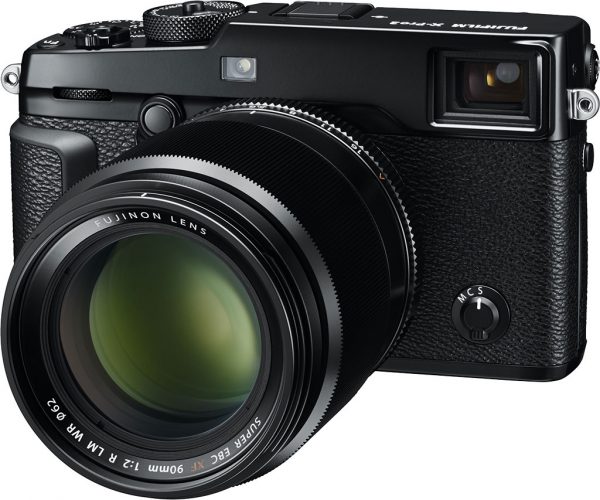
I recently got the Fuji X-Pro 2 with a new 90mm ƒ 2 lens

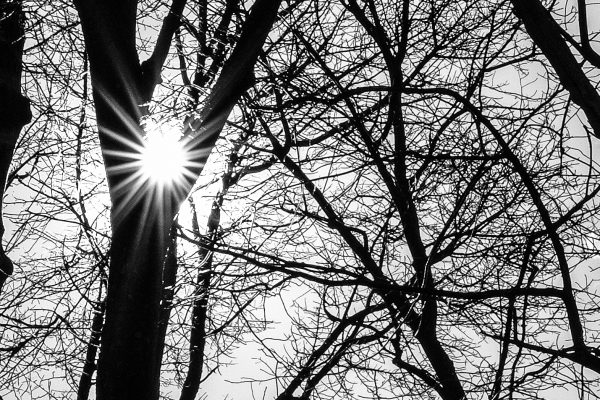
Now what I do, when I get a new camera, is to take it out into my backyard and just start taking the most banal, ordinary shots. I had heard about the new film simulation modes, so I shot raw + jpeg, and experimented with some of the new modes… but really just snapped away at things just to see what the camera did. I tried Velvia and the Acros B&W _ I don’t know what I was expecting to see about B&W with the following shot, but I was also testing the new 90mm ƒ2 lens, and a good way to check the quality of sharpness of a lens is to shoot backlit tree branches…
Branches

Backlit branches are a good test for lens sharpness.

I was shooting all kinds of really dull photos until I got to this… a shot of my wife’s little red Mazda—this is the jpeg straight out of the camera using the Velvia film simulation! (click on the images to see a larger version)

The red Mazda

The red Mazda! (click on the image to see a larger version)

Well… it looked pretty good—So I thought I’d check out the raw file…

Fuji-side_X_side A

Adobe Standard from raw on the left – Fuji Velvia camera jpeg on the right (click on the image to see a larger version)

OK… so the Velvia jpeg looked really good. But I was pretty sure I could make the raw file look as good, if not better. So…

Fuji-side_X_side-b

Cannot match color with Adobe raw!

I tried… Fiddling a bit with the basic sliders, I could get the hue and saturation to match pretty good, but I struggled to maintain the subtle tones and colors in the gradations. Look at the little reflections at the left! The Adobe processed version started to merge into the overall color the closer I got to the Velvia version for saturation and color.  And the subtle highlights at the upper right corner—I couldn’t maintain that slight blue from the sky reflections! Now I am an expert in image processing, and I could go into Photoshop and work some JuJu with Lab, and luminosity masks to get this to match, but the point here is that if I hadn’t seen that Velvia version, I wouldn’t know to aim for that look. Fuji is clearly doing something way more sophisticated in their color and tone mapping to get this look!

Hmm… I’m now beginning to think that Jpegs might not be bad after all…

How many of you out there have shot Velvia film? This is what Fuji says about Velvia: a high-contrast palette of saturated colors, suited to nature photos. Well… its certainly good with red…So I proceeded to shoot lots of red things… This one is shot in the Chihuly Garden and Glass museum in Seattle…

Chihully Red-1

Chilhully Glass (click on image to see a larger image)

Chihully Red & Green

Red & Green. (click on the image to see a larger version)

The shot above shows off the saturated green that is typical of the Velvia rendering, as well as the red. OK, so Velvia is cool… let me try out some of the other film simulations.

Astia/Soft: Enhances the range of hues available for skin tones in portraits while preserving the bright blues of daylight skies. Recommended for outdoor portrait photography.

AdobeStandard-Astia

Adobe standard – left • Astia/Soft – right (click on the image to see a larger version)

So here is Astia/Soft film simulation straight out of the camera on the right, open shade with auto while balance… very attractive! This was shot during one of our Portrait workshops in Seattle. Let me try to adjust the Adobe raw to get the same look…

AdobeStandard_match-Astia

Close but no cigar! (click on the image to see a larger version)

I think I did a pretty good job of matching the hue and saturation in the skin tones using Lightroom, but there is more tonal shape in the blue shirt, more detail in the hair, and the skin tone just has a different subtle glow in the Astia version!

Jpegs can be pretty good after all…

Astia turns out to be very good with high-contrast lighting situations – here is a Chihully glass sculpture shot with the sun directly behind shinning through in Velvia…

Chihullly Glass in Velvia

Chihullly Glass in Velvia. (click on the image to see a larger version)

Here is the same thing with Astia… much softer with better highlight detail and softer shadows.
Chilhully Glass in Astia

Chilhully Glass in Astia. (click on the image to see a larger version)
Astia is particularly good with blue-hour photos. This is a shot from our recent visit to Oman, at the Royal Opera House in Muscat.

The Royal Opera House in Muscat.

The Royal Opera House in Muscat. (click on the image to see a larger version)

Here’s another really contrasty situation… the soft rendering works very well for my wife, the mistress of light Bobbi Lane. This was shot right outside the EMP Museum in Seattle…

Bobbi Lane, the mistress of Light.

Bobbi Lane, the mistress of Light. (click on the image to see a larger version)

Even with the hard direct kick of light on her, the Astia film simulation is very soft and forgiving.

Here is an example where I think its a little too soft… this was taken during Bobbi’s Portraits UnPlugged workshop in Dubai… Now you can still edit the jpegs…

Astia Portrait

Astia on the right is a little too soft. (click on the image to see a larger version)

Astia revised

A simple move with the black slider in Lightroom. (click on the image to see a larger version)

So I just took the black slider in Lightroom down a little bit to snap in some contrast, and… it just sings – I really prefer the color of her hair and the rendering of the blue! Up until this point in my testing I had been using a lot of different settings without really knowing what I was doing. However, I soon discovered that you actually have a lot of control over the rendered image by taking advantage of Fuji’s shooting modes: Image size & quality, Film Simulation, Grain Effect, Dynamic Range, White Balance, Highlight Tone & Shadow Tone, Color, Sharpness & Noise reduction

Some of these are fairly obvious, and we’ve seen a little bit about Film Simulations… but Dynamic Range and Highlight and Shadow Tone deserve a little more explanation…

Dynamic Range

Dynamic Range.

So… dynamic range is a setting for overall contrast 100% is “normal” and 200 & 400% are softer. Auto will change from 100% to 200% when you select an ISO above 400… If you manually select 200 or 400 you won’t be able to use the softer rendering below the cut-off ISOs of 400 and 800 anyway. I keep the Dynamic Range at 400% to ensure lower contrast for low light situations which tend to be more contrasty—it always kicks back to 100% when I go back down to ISO 200, the native ISO of the Fuji X cameras.

Highlight Tone

Highlight Tone.

Highlight tone is a contrast setting for highlights, going from -2 to +4 with “0” being normal. Minus settings move the highlights darker, as expected, reducing the contrast.

Shadow Tone

Shadow Tone.

Shadow tone, however uses the same values, perhaps counter-intuitively, in the same way—minus settings are softer, moving the shadow values lighter. Here’s Bobbi again, shot with the Acros film simulation (we’ll take a look at this in detail in a moment), and a Shadow Tone setting of +3…

Acros Shadow +3

Acros Shadow +3 (click on the image to see a larger version)

Here is the same shot with a setting of “0”

Acros - zero

Acros – zero (click on the image to see a larger version)

Now you’ve probably noticed that I have several shots here processed in different ways. This is because the Fuji cameras are capable of processing Raw files in-camera, after the capture! At any time after shooting, if you shoot Raw + Jpeg, you can come back and re-process any number of variations. When you are playing back an image, you press the “Q” button, and then you get a menu of all the Shooting Mode settings, that you can change to set up a new rendering – hit “Q” again and you can save the new Jpeg right to the card.

XPro2_back

X-Pro 2 – play and process with the “Q” button

So lets take a look at the new B&W Film Simulation of Acros available with Yellow, Red, and Green filter simulations…

Acros G

Acros G

Above is from a shot I captured in the fish market in Dubai—a really great location for street photography—Acros with Green filter setting.

Close up - sharpening

Close up – sharpening ( to see detail, click on the image to see a larger version)

Looking up close we can see that Acros has some interesting sharpening. Attempting to get the raw file to look as sharp is not all that successful – look at the detail in the hair in the Acros version, plus Adobe’s sharpening accentuates the noise in the skin, which is absent in the Acros version. The detail in the hair and eyebrows is impressive — this was shot at 1600 ISO !

So… one of the big things about using these Film Simulations is that you see the results of the film simulation in the EVF — here is a raw file in color, again from a shot captured at the fish market in Dubai –

Fish market "cutter" in Dubai

Fish market “cutter” in Dubai

if I had seen this in color in the viewfinder, I might have decided that the man in the red shirt, in the background, was too distracting. I might have moved to try and eliminate those men in the background and might have missed this great un-posed moment. This is what I saw in the viewfinder…

Fish cutter in B&W Acros-G

Fish cutter in B&W Acros-G (click on the image to see a larger version)

Shooting in B&W affects the way you “see” the scene, and it becomes much more part of the moment of the capture. The notion of “pre-visualization” goes away, and becomes simply “seeing” the shot!

When Acros is combined with -2 Highlight Tone, you get very subtle differentiation in highlight values – this and the following images were captured at the Getty Museum in Los Angeles.

Getty Museum - great highlight tones

Getty Museum – great highlight tones (click on the image to see a larger version)

Here a +3 Shadow Tone created deeper shadow tones for a more dramatic rendering.

Getty Museum - shadow tones

Getty Museum – shadow tones (click on the image to see a larger version)

OK, so lets get back to the Film Simulations – Fuji has a bunch of them… lets take a look at them…

Provia / Standard

Provia / Standard (click on the image to see a larger version)

Velvia / Vivid

Velvia / Vivid (click on the image to see a larger version)

Astia / Soft

Astia / Soft (click on the image to see a larger version)

Classic Chrome

Classic Chrome (click on the image to see a larger version)

PRO Neg Hi

PRO Neg Hi (click on the image to see a larger version)

PRO Neg Std

PRO Neg Std (click on the image to see a larger version)

Acros

Acros (click on the image to see a larger version)

Acros Y

Acros Y (click on the image to see a larger version)

Acros R

Acros R (click on the image to see a larger version)

Acros G

Acros G (click on the image to see a larger version)

Sepia

Sepia (click on the image to see a larger version)

The requisite “Sepia’ simulation is my least favorite! I just find this dull and unattractive — I’d rather take the Acros B&W and add the tone in Lightroom!

Acros vs Monochrome

Acros vs Monochrome – you really have to click on the image to see adequate detail.

Fuji has a “MONOCHROME” Film Simulation that is very similar to the Acros, but is missing the sharpening effect that gives enhanced detail. Acros also has a nice subtle film grain look that I find attractive – these last two shots are show here at 200%, shot at 200 ISO — I don’t see any reason to use MONOCHROME when Acros is available!

Now I’m not necessarily advocating that you give up Lightroom or Photoshop for in-camera Jpegs. I just feel that very often, with the Fuji X-Pro 2, the Film Simulations end up being a much better place to start than the Adobe raw rendering. Here is an Acros with Green filter straight out of the camera—one of my shots from our Hollywood Glamour workshop. Pretty great the way it is, but it can still use some retouching…

Hollywood Glamour shot – Acros G

Hollywood Glamour shot – Acros G (click on the image to see a larger version)

Straightening the tie, spotting, re-working the background highlight, and adding a split-tone effect finishes it.

Retouched Final

Retouched Final (click on the image to see a larger version)

Do I need to say “Jpeg is my Friend?”

OK, for review, Mirrorless is the way to go for several reasons: (1) The EVF offers the very real ability to see exactly what you are getting before you press the shutter. (2) This means you are “seeing” the shot not just pre-visualizing through a viewfinder. (3) Jpegs are not bad, in fact they can be your ally in creative image creation. (4) Fuji’s Film Simulations Rock and the (5) Shoot Modes of Dynamic Range, and Highlight & Shadow Tone offer a lot of control over the look of the image which you can use at the time of the shot or (6) afterwards by re-processing in the camera.

I’d like to thank Fuji for creating such great photo creation tools. There is a lot more to their system than just the Film Simulation modes. We didn’t talk about the X-Tran sensor’s lack of low pass filter, or the incredible high quality optics, or any of the other great camera models, so be sure and check them out. If you are already using another mirrorless system, try using the picture styles for in-camera jpegs, or simply for changing the way you “see” the scene! You may find that it enhances you ability to “see” creatively!

Begin new material:

Since this was posted, a lot of people have chimed in with the idea that Fuji has supplied their film simulations in the Camera Profile tab in ACR/Lightroom. There is a widely held notion that Fuji embeds their profiles in the Raw file. This is simply not true! Fuji does not embed any look-up tables, profiles or any other color information in their raw files—the camera “profiles” you see in Lightroom or ACR are provided by Adobe as part of their support for the Fuji XT1 and X-Pro 2. If you examine the RAF files with a metadata reader, you will find nothing but a few cryptic “maker notes” — these are short “labels” that look something like “XRT32Z6…” a very short bit of mystery characters that only mean something to Fuji. An actual look-up table with a full rendering intent would be prohibitively large, and add way too much weight to the file! Adobe, in creating their support of any new proprietary raw file, uses a fairly generic de-mosaicing algorithm, and fine tunes by taking a picture of an X-Rite ColorChecker, mapping the colors to the known lab values of the 24 patch target. This becomes the Adobe Standard profile. Then they examine the camera jpeg renderings of the target through the various film simulations and try to re-map the tones & colors from their interpretation of the raw data to get some kind of match. Fuji has tacitly “approved” these “emulations” by giving Adobe permission to use their trademarked names for these emulations, but that is not the same thing as supplying real tone & color mapping data with a proprietary de-mosaicing algorithm for Fuji’s unique, non-standard (non-bayer) mosaic pattern. The bottom line is that Adobe’s versions of Fuji’s film simulations, are not the same, they are all basically tone/color variations of Adobe Standard which is considered colorimetrically neutral—the new image processor in Fuji’s new X-Pro 2 camera uses very sophisticated hard-wired rendering algorithms that take advantage of luminosity data before de-mosaicing, and color interpolations based on very specific Fuji de-mosaicing for the unique pattern of their chip! So… while most of the time with some of the film simulations, the Adobe emulations are quite reasonable, they are not the same. Here are some examples of very reasonable Adobe Raw emulations:

Bobbi-Venice_sidebyside-1

Here Adobe’s version of Velvia is on the left – Fuji’s in-camera Jpeg on the right. In this particular image Adobe has managed a very close match for tone and color!

BobbiHair-sidebyside

You’ll have to click on this image to see a larger version, but zoomed in to 100% you can clearly see that the in-camera Jpeg, on the right, without any sharpening applied, is more detailed than Adobe’s version on the left.

Acros-sidebyside

Similarly with this one, a bit more subtle, but you can still see that the Fuji in-camera Acros jpeg, on the right, is slightly more detailed in the hair and skin, than the Adobe emulation on the left

BTW, Adobe provides a tool for generating Dng “profiles” that is similar to what they use to build their support for new cameras. Its called the Adobe Dng Editor, still available as “beta” software, though it hasn’t really changed in years— you can download it here (you may have some trouble with these links—try right-clicking to copy the link, or Command-clicking to open in a new tab):

for Mac: https://www.adobe.com/support/downloa…

for Windows: https://www.adobe.com/support/downloa…

If this little presentation gets you to consider the Fuji in-camera jpeg renderings, then you owe it to yourself to TEST THIS OUT FOR YOURSELF! If, like me, you can see a difference with image files you care about, then consider shooting RAW + Jpeg and use those Fuji Film Simulation Jpegs as the starting point for your creative vision!

To see a very in-depth review of the Fuji X-Pro 2 go to Imaging Review

Here is a gallery of Fuji X-Pro 2 images – click on thumbnails to launch slider of large images.