The Rocco’s Barber Shop Shoot
I recently had the great pleasure of shooting some photos for my local barber shop, for use on their web site. This is an old-school type barber shop that I frequent, in my town of Scituate MA. I approached this opportunity as an exercise in environmental portraiture, and as a chance to get familiar with the new Phottix Indra500 TTL Studio Flash. I certainly could have just shot photo-journalist style, with only available light, but I thought, why not glamorize the barbers a bit for the website— give them the “star” treatment, while still showing them at work in their environment! The battery powered Indra500 TTL proved to be ideal for this assignment!
I’ll provide a link to a web gallery of the highlights from the shoot a bit later, but I thought I’d show just a few shots demonstrating my thought process for the lighting and setup of the shots, with some simple post process enhancement techniques. My original though was to use the Indra500 with Phottix’s Luna Folding Beauty Dish , as a main light. Here’s a shot of me with the Indra500:
This particular image is certainly a candidate for a little extra massaging to display the subject in the most pleasing manner. Joe is in his 70’s, and there is no point in trying to hide his age with extensive retouching—it would only hide his strong character, and end up looking fake anyway! But a little finesse goes a long way: Here is a close up of the basic rendering of the raw file:
The key is to not overdo it! The retouching here is very subtle. No attempt has been made to change the skin texture -only a little lightening here and there to fade some of the darker wrinkles and skin spots. Put a little more light in the eye, and brighten the teeth!
So far, all of the shots I’ve shown utilized the Indra500 with the Luna Folding Beauty Dish as the main light source. Bobbi Lane was with me at the shoot, and she actually got some of the better shots using a Phottix Mitros+ speed light with an Ares flash trigger her Fuji XT-1 camera. Her strategy was to bounce the flash off the wall—the result was a very natural looking soft light, that ends up looking most flattering:
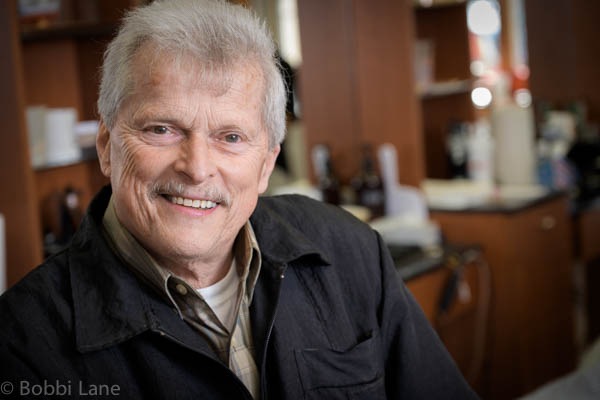
A simple speed light can often look especially beautiful by bouncing off a wall. The super large wall/light source smooths out skin texture with nice soft modeling of the features. Shot by Bobbi Lane
Bobbi and I will be leading a hands-on workshop exploring all aspects pf lighting, posing, shooting, and post process enhancing of portrait photography of “Real People” at the Los Angeles Center for Photography, April 17th – 19th, 2015 – signup before all the spots are gone!
I posted a web gallery of some of the highlights from the Rocco’s Barber Shop shoot on my website in the Galleries section here:
https://varis.com/Galleries/galleries/RoccosBarberShop/
One final Lightroom tip for the ladies! Often, when we are putting together client galleries for approvals, we want to present images to indicate the some level of retouching will occur after the choices are made. We want a more flattering “glamorizing’ rendering for women without having to actually do retouching for every image presented in the gallery. In such cases, I will often simply brush in negative clarity using the Adjustment Brush in Lightroom — here’s an example shot of Laurie:

The original un-enhanced version from Lightroom
Now, at this size it looks fine, but every woman wants to look a little more glamorous, and a larger size image reveals a bit more skin texture than we’d like. So, one minute of brushing with Lightroom’s Adjustment brush can do wonders—here’s the brush mask displayed with the show mask overlay checkbox:
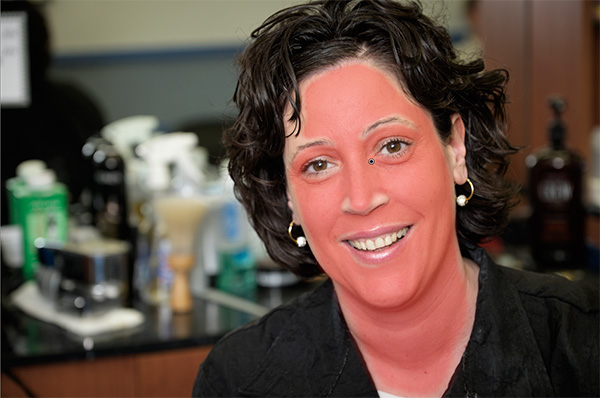
The mask overlay in Lightroom
The final effect:


Thanks Lee and congratulations on your marriage