Imaging Workflow Beyond Lightroom & Photoshop
Most of the time, photo-imaging workflow can be completely managed within the familiar applications of Photoshop, Lightroom, Bridge, Photo Mechanic, etc… but occasionally it becomes necessary to go beyond the capabilities of these programs to automate more complex series of steps that involve multiple applications. Such was the case for me, when my friend Eduardo Angel asked me for a particular workflow solution – he wanted to have something he could drag a bunch of images onto, that would re-size, re-name, and duplicate a half dozen times into separate folders, all at different sizes! Currently, this is beyond the capabilities of Photoshop’s Image Processor Script, but well within the capabilities of Apple’s Automator application!
If you are on a Macintosh computer, you are in luck! Automator is a very cool program that can build fairly complex Applescript workflows, but its easy enough that mere mortals can use it successfully. Automator comes with a very robust set of pre-set Applescript “actions,” but to do any serious image editing chores you will need to download some 3rd party Automator actions! Fortunately there are some free Photoshop Automator actions available on RobotPhotoshop.com – here:
http://www.robotphotoshop.com/?page_id=8
Scroll down the page to find the free download for your version of Photoshop (under the Paypal button) There is, of course, a “pro” version with many more “actions” available for a modest fee. The free version is perfectly adequate for the file copying, re-naming, and re-sizing Automator applet I describe in detail in the following:
After you install the RobotPhotoshop “actions,” launch Automator:
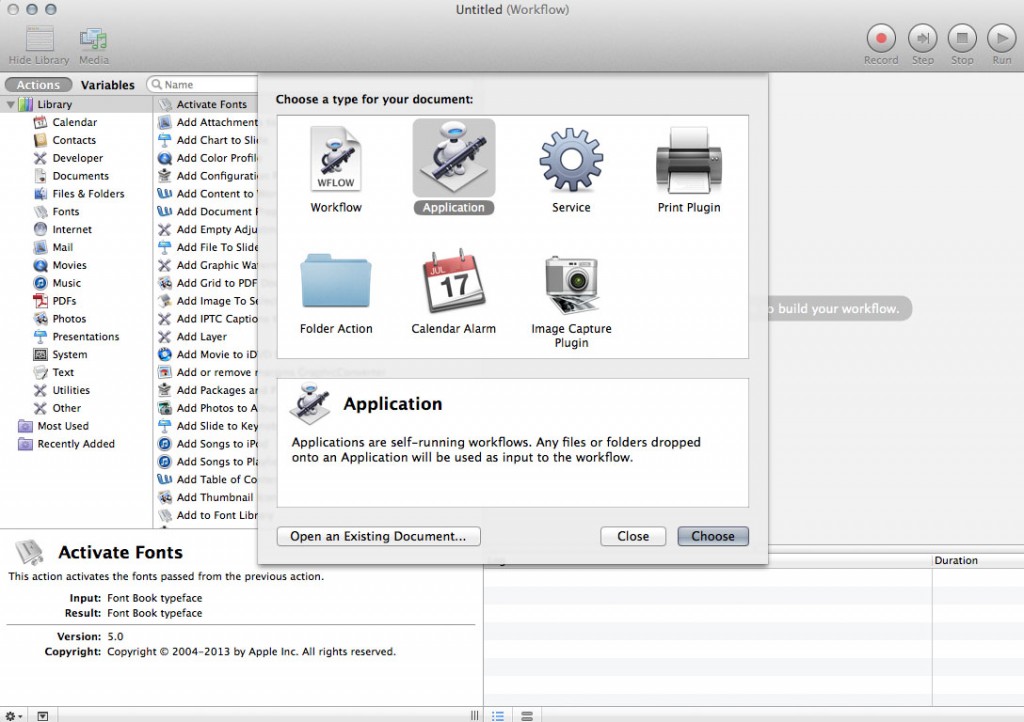
Automator asks what kind of document you want to create at launch
I am going to want a “droplet” app to sit on the desktop where I can drag a bunch of images onto it and it will run the Applescript actions – so I select Application as the document type!
When the new document opens there is a list of Automator “actions” in the left side panel – the “Library” contains different categories of actions. I will be using “Files & Folders” and “Photos” categories – clicking on the category reveals the list of actions for that category.
Starting with”Files & Folders” I want the action to copy files to a new location, so I drag the “Copy Finder Items” action from the left side into the right side panel:
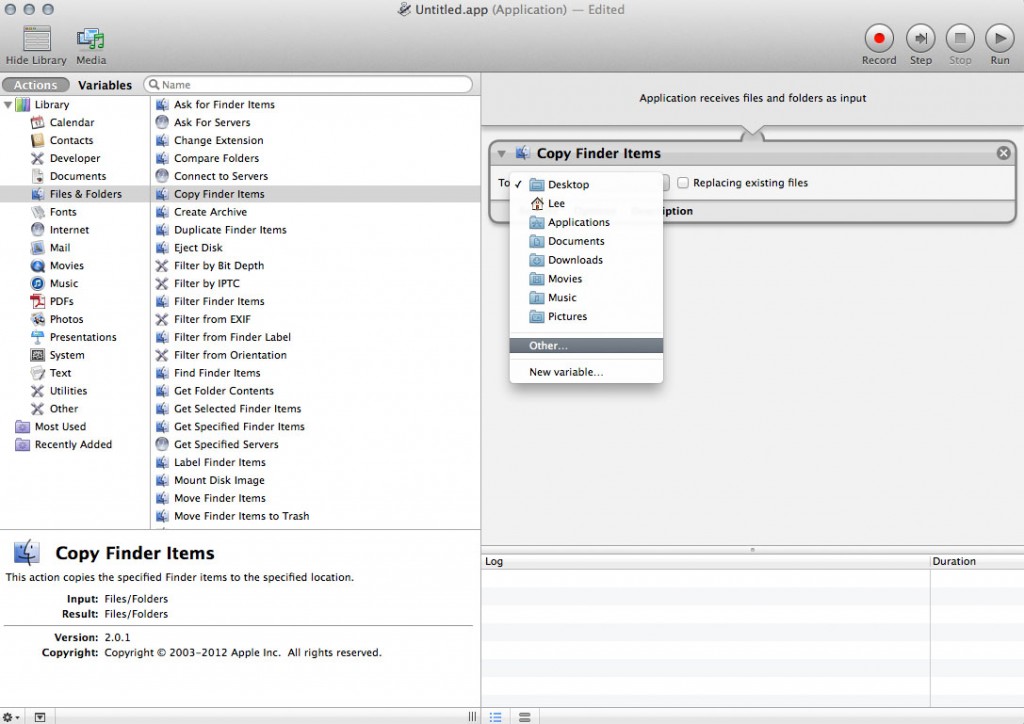
Copy Finder items to your choice of location.
The idea is that I want to copy files to multiple locations and have them be at different sizes for mobile ready web application in a responsive website design. So I build a “Web-Images” folder, with multiple sub-folders named for the different sizes. I want the action to copy the image files and re-size them for successively smaller sizes into the appropriate folders, and then re-name them so I can tell, at a glance what size the image is by its name, just in case they get misplaced somewhere while I’m working on the website. Now that I’ve got the script-in-progress copying files into the first folder, I want to rename them:
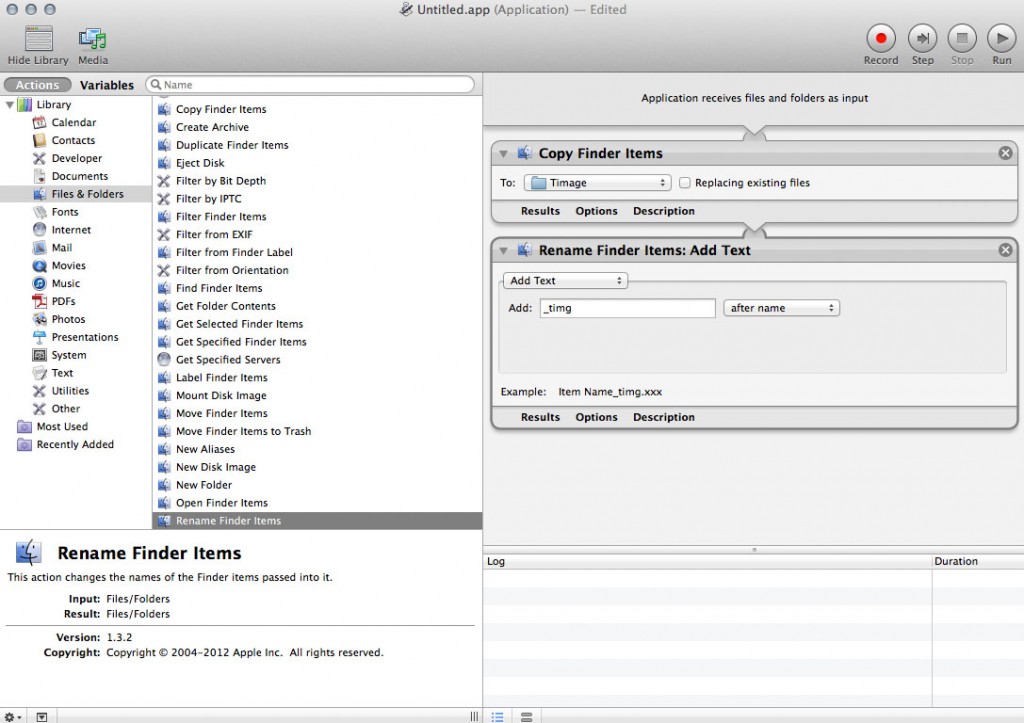
Rename Finder Items has several different ways to re-name.
I drag the “Rename Finder Items” action from the list into the right panel. The way Automator build complex scripts is by connecting these actions one to the next, as displayed in the right panel, top to bottom. Here, after the files are copied, they are renamed according to the settings in the little action window — in this case I want to append some text describing the use of the image in the folder. Next I need to re-size the image – for that I want to launch Photoshop, so I drag in the “Open_CC” action:
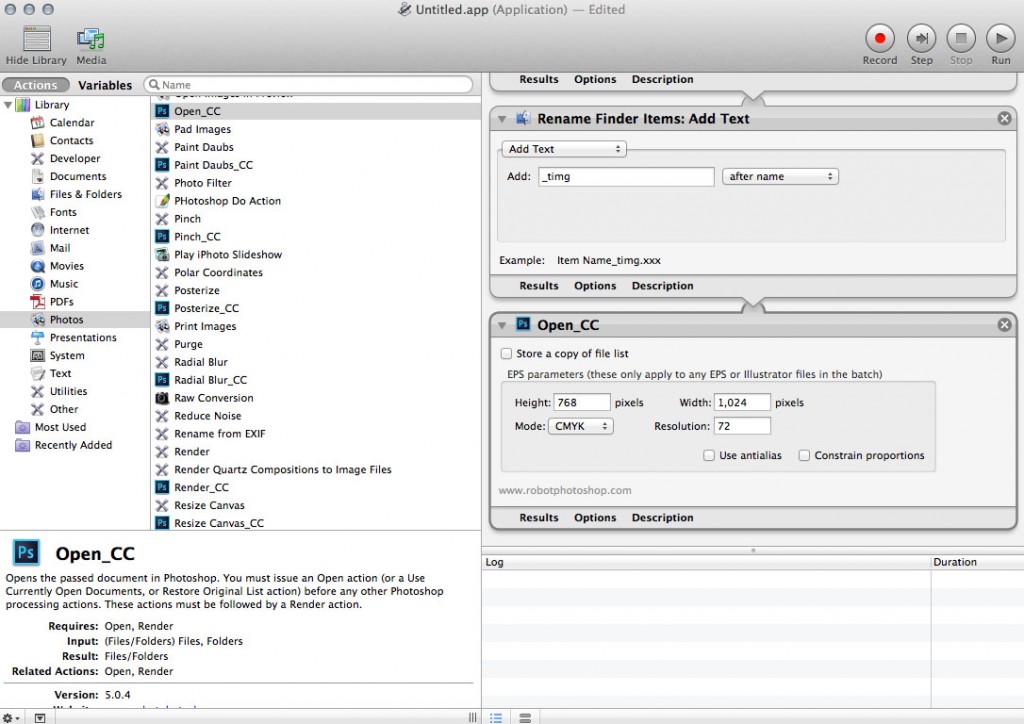
Launch Photoshop is contained in the Open_CC action
This action opens the files (just copied and re-named) into Photoshop. I have to run this before re-sizing. Next I drag in the “Re-Size Image_CC” action:
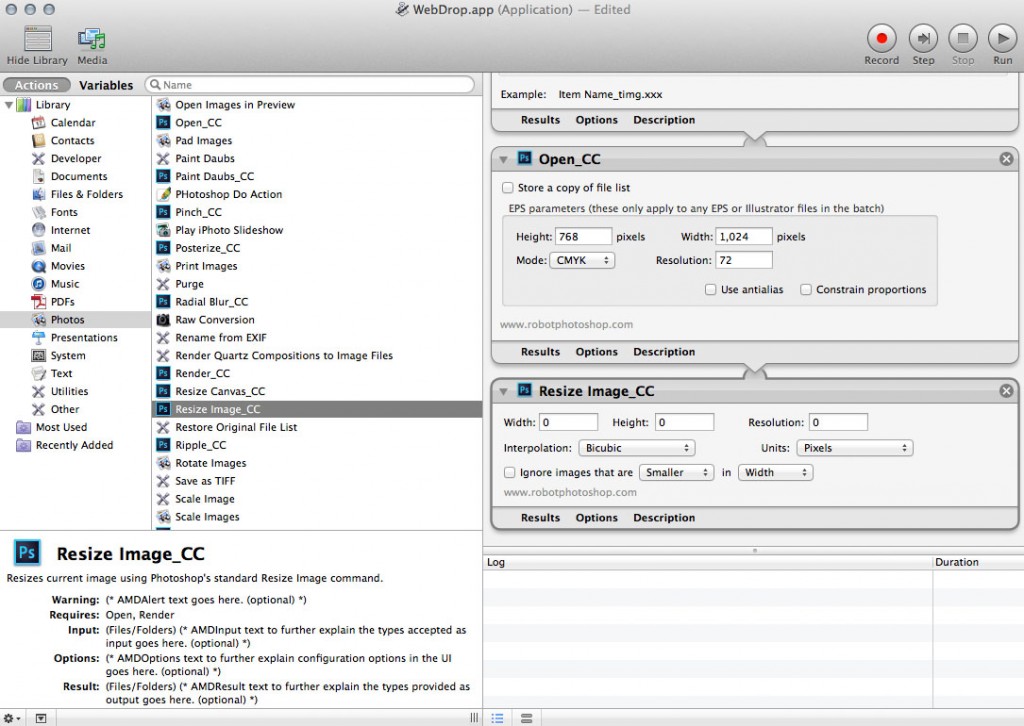
Enter the size in width to scale to fit, without changing aspect ratio.
I set up the parameters for the re-size by entering a value for the width only – that way Photoshop will re-scale the image to fi the width without altering the aspect ratio. I also set the unties to pixels and the interpolation method to Bicubic sharper (you’ll see the settings in the next screenshot). After doing anything to the images you have to execute a render action to get the files back onto the disk – drag in the “Render_CC” action:
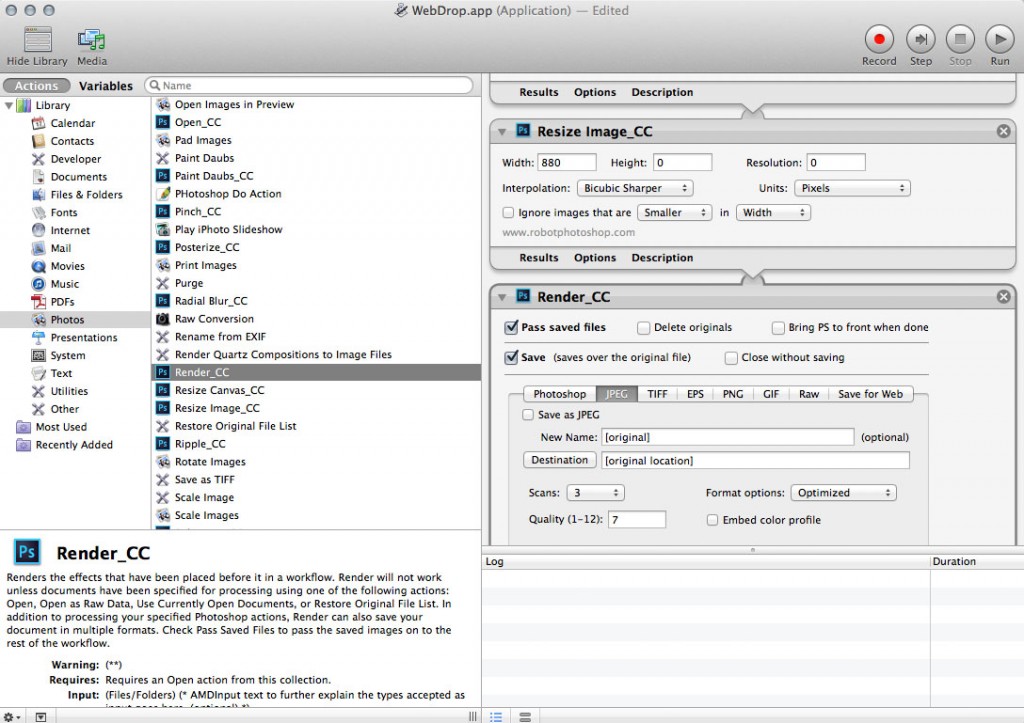
The Render_CC action is necessary to get the files back onto the disk
OK, now I have copied files to a new location, renamed them and re-sized them. All I have to do is repeat this for each new file size I want, and keep copying the files, renaming them, and re-sizing them. The only thing that changes is the size setting and the re-name. each time I’m going to connect the action to the files in the last folder by dragging the first step “Copy Finder Items” into the right panel after the Render_CC action, then the next and the next, exactly as before until I end up with the complete set of different file sizes! I can re-name the files with a replace text setting so I don’t keep adding to the file name each time.
When I’m all done, its time to save!
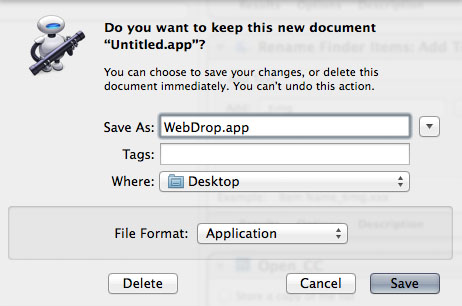
The Save dialog is where you decide where to save the “droplet” app & what to call it.
Now, of course its time to test the applet which looks like a little robot holding a pipe:

The Automator applet icon
Drag a file onto the applet – it copies the file into the first folder, launches Photoshop, and runs through all the steps one after the other, much faster that you could ever do by yourself. You always want to check for mistakes, and re-edit if necessary. You can drag any number of images onto the applet and it will execute all the commands on each image one after the other — very cool.
If you spend just a little time playing around with automator, you will find many workflow tasks that can be automated using this tool – the possibilities are almost unlimited and you can connect different applications together in ways that would otherwise be impossible. If you are on a Macintosh, you owe it to yourself to give Automator a try!
