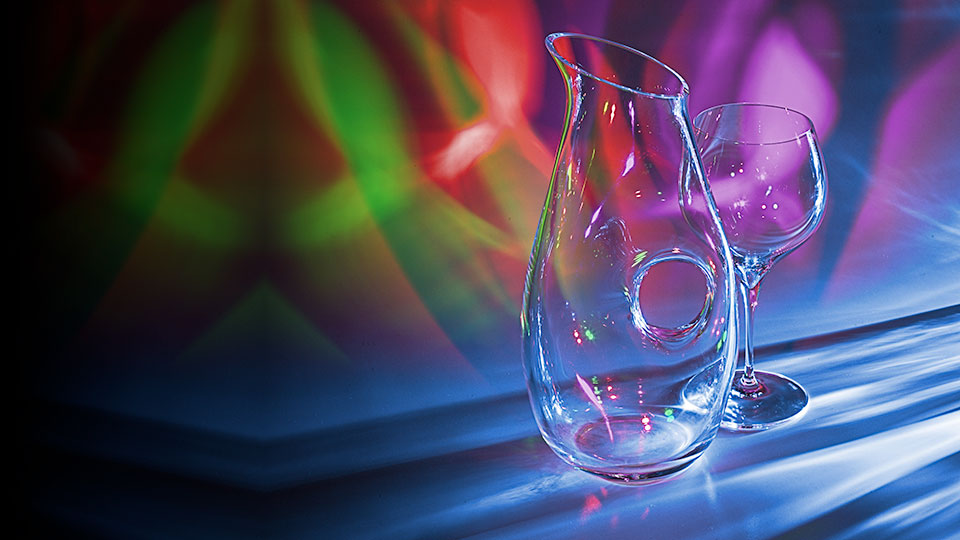
I recently posted a tutorial for my “False Color Technique” here and I’ve had to revise the technique drastically. The basic approach involves placing different shots of the same subject, with different lighting directions, into the individual channels of an RGB document. My original strategy relied on “Splitting” the channels of the various separate files and then using the “Merge Channels…” command from the Channel Options fly-away menu. You can read the original blog post “False Color Technique” here. Anyway, much to my chagrin, the “Merge Channels…” command is broken, at the moment, in Photoshop CC! I found this out during a rather embarrassing demonstration at a Still Life workshop I gave not long ago. Merging Channels in Photoshop CC appears to work at first, but as soon as you zoom in, you get garbage, and the saved file opens as black! So… I ended up developing a workaround, which has now become my preferred method, because it offers many advantages over the previous technique. The following is now the “New CC False Color Technique.”
First, you need to capture a series of images of a static subject, with the camera locked down on a tripod, and with different lighting directions. Next, select 3 files, in Lightroom or Camera Raw…
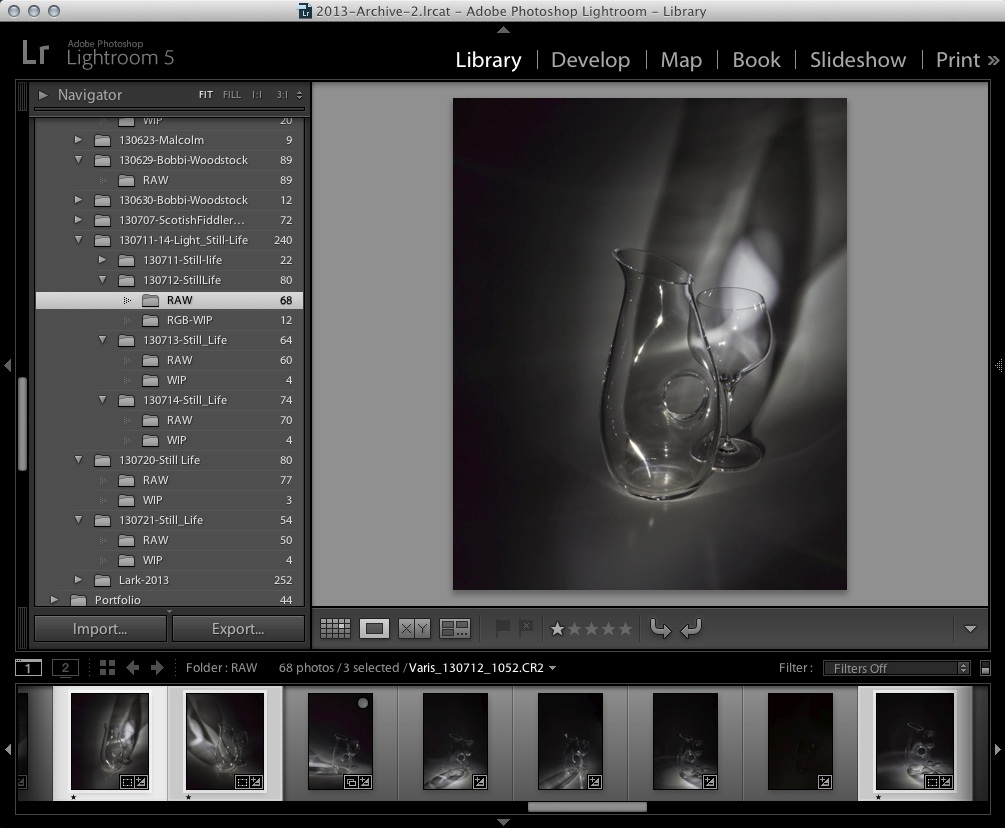
Select 3 different files for processing in Photoshop. The technique works best with subjects that are essentially monochromatic
Then arrange to open them as layers in Photoshop…
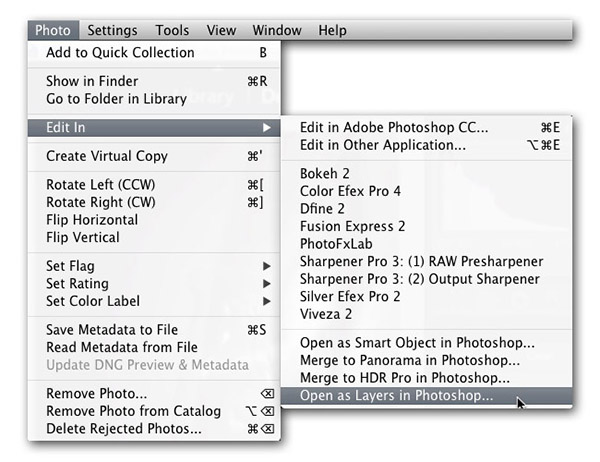
Lightroom makes it easy to open as layers, plus it keeps track of your new document and will automatically add it to your catalog!
The files will assemble as layers in a new document in Photoshop. Turn off the visibility of the top two layers by clicking on the little eye icon next to the layer thumbnail, and highlight the bottom layer.
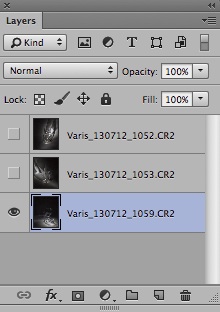
The Layers panel showing the top too layers turned off.
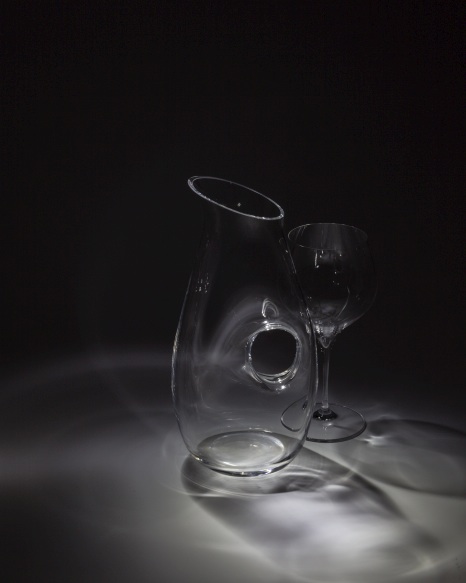
Though this image looks B&W it is actually a full-color RGB image of a monochromatic subject, lit with a flashlight.
The task now is to get this image to exist in only one channel of the document. We will do this by using a “black” layer right above this bottom layer and targeting just two of the channels… First, select “Solid Color…” from the Adjustment Layer icon at the bottom of the Layers panel…
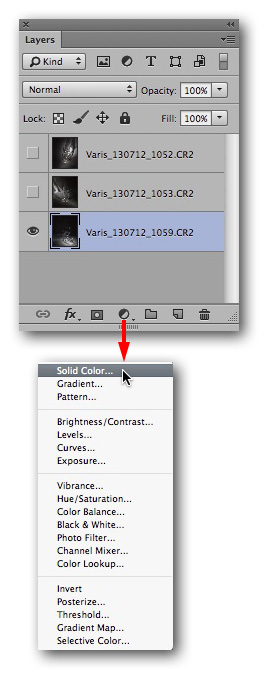
Selecting “Solid Color” from the Adjustments icon will generate a fill layer after presenting you with a color picker dialog.
Pick a zero-black color in the resulting Color Picker dialog, and then select “Blending Options…” from the Layer Options flyaway menu…
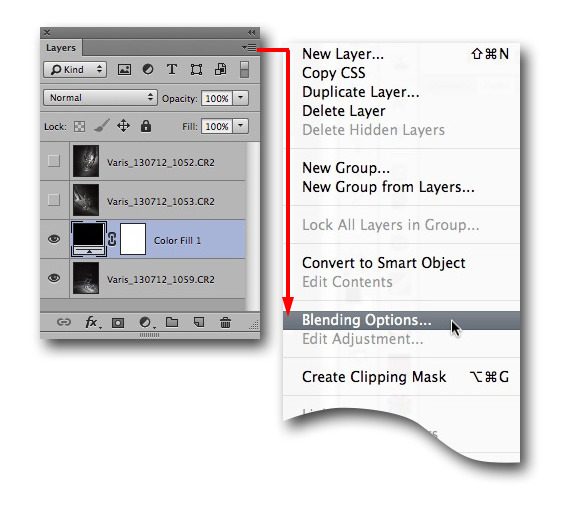
We will use Blending Options to target the channels.
Now, un-check the “G” channel in the “Advanced Blending” area of the resulting dialog…
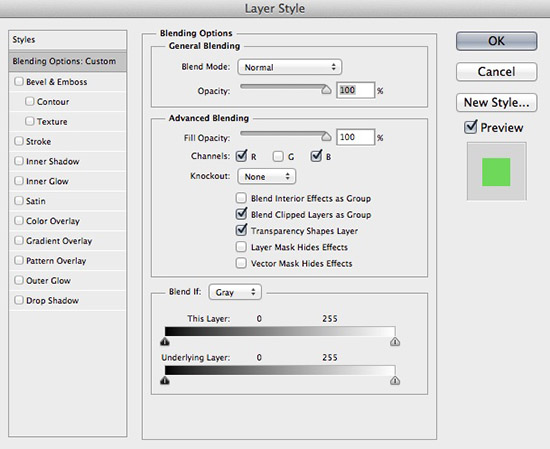
By un-checking the green channel the black fill layer will only “cover” the red and blue channels, leaving the image visible in the green channel.
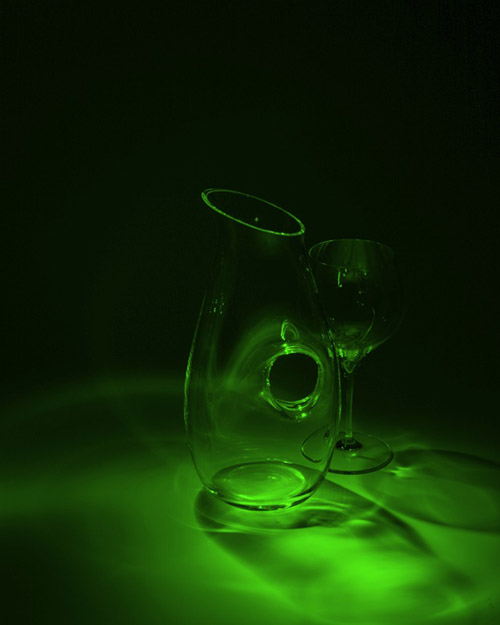
The image now only exists in the green channel.
Now all we need to do is get the other layers to target the red and blue channels. Highlight the next layer, and return to the Blending Options dialog. This time un-check “G” and “B” leaving only the red channel.
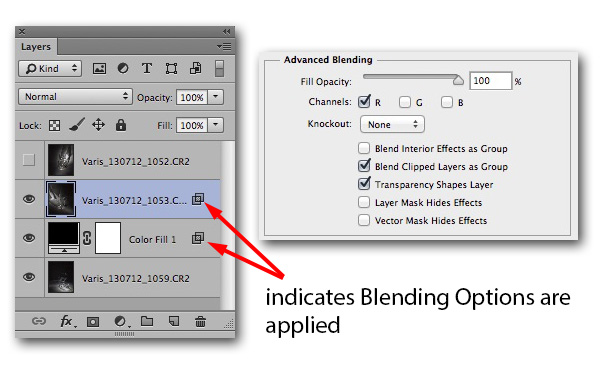
The screenshot above shows just the Advanced Blending options portion of the dialog to save space. You can also enter Blending Options by double-clicking in the empty area of the layer. After you apply any Blending Options, a little icon will appear at the right side of the layer in the Layers Panel.
The next layer now replaces the black content in the red channel, resulting in the following image…
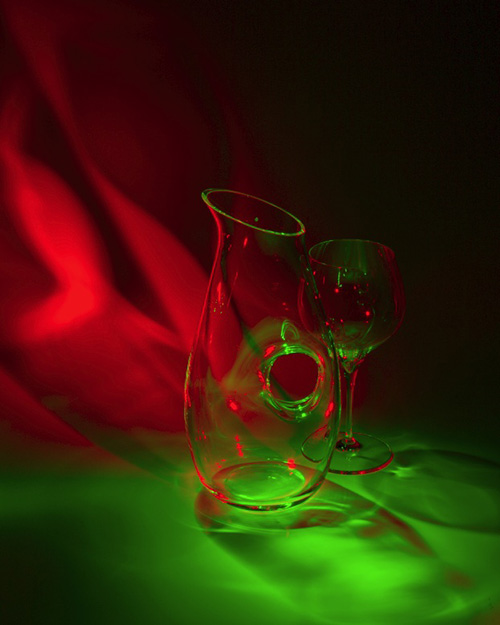
There is now different content in the red and green channels. The original subject was lit with white light and had no color of its own, but by strategic targeting of individual channels, we can introduce very intense colors!
Repeat the process with the remaining top layer, but this time, un-check “R” and “G” leaving just the blue channel
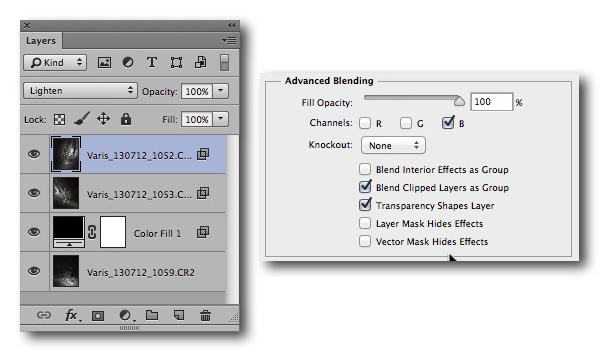
You will notice that, in the bottom layer, we covered up the channels where we didn’t want color. In the other layers, the process targets the channels where we want color to appear.
The final RGB version…
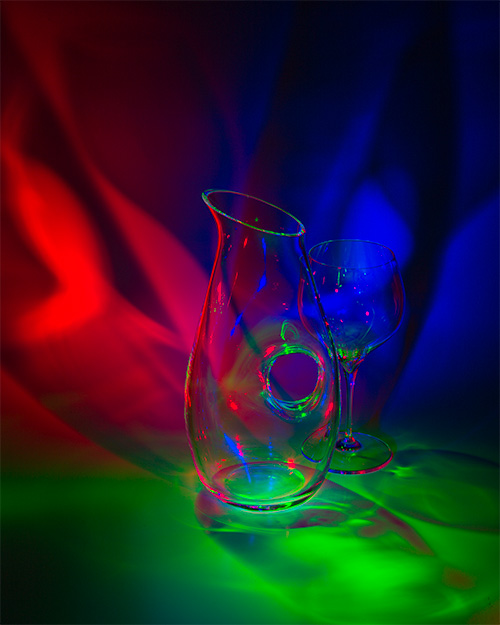
This version has different content in each RGB channel. There are lots of possible combinations, plus you have the ability to mask out anything you don’t like with a layer mask.
The above simply replaced each channel with a completely different image. There are other options available. For instance, if we don’t use the black fill layer, and instead of replacing the content of the blue channel, we add to it with a “Lighten” blend mode in the top layer…
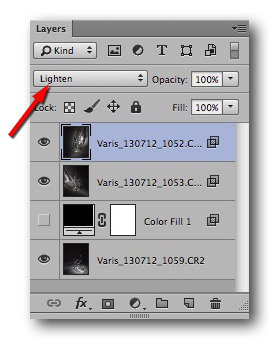
Instead of replacing the blue channel with new content, we can simply add to it with a “Lighten: blend mode in the layer

The light from the bottom layer now exists in both the green and blue channels because the top blue layer doesn’t replace the content in the blue channel.
There are all kinds of variations with different combinations in the different channels. Add layer masks into the mix and you have endless control over the color generated by this approach. Here are some examples of such variations with another image from my workshops.
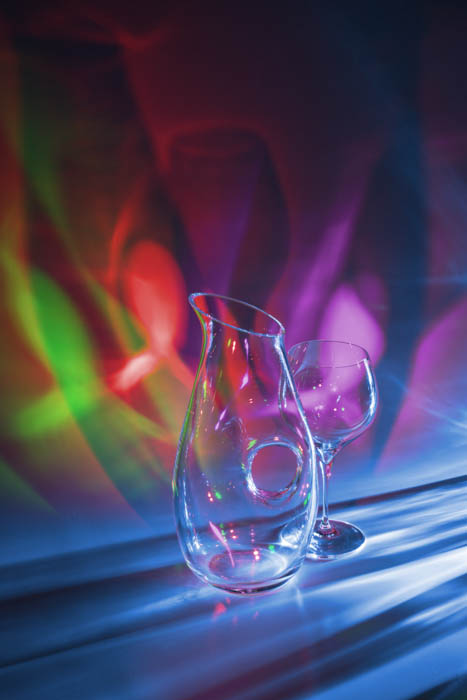
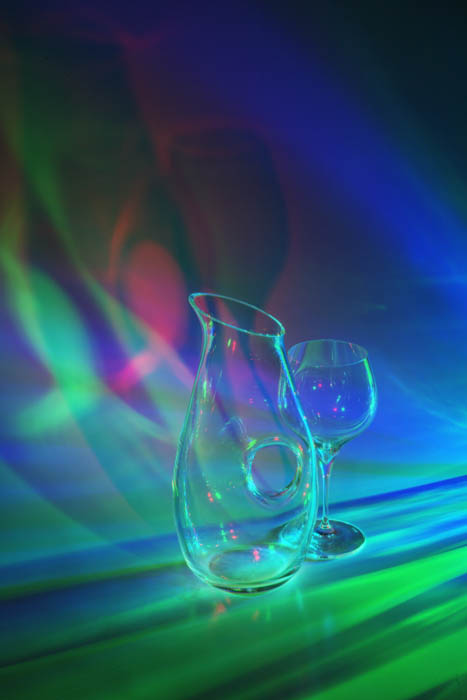
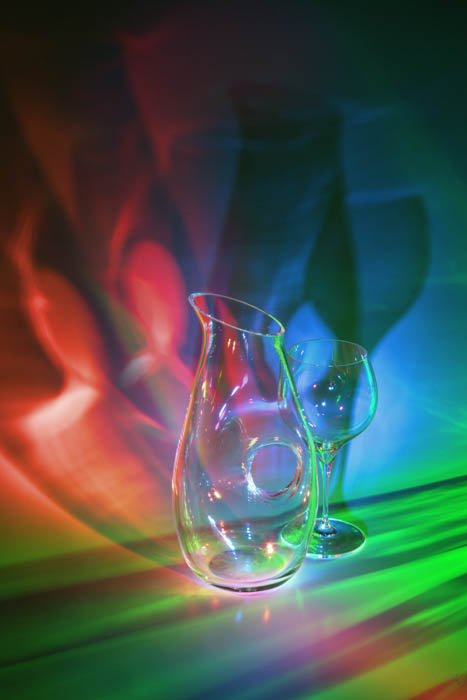
The red, green, and blue, colors do not have to be so intense – simply reduce the layer opacity…
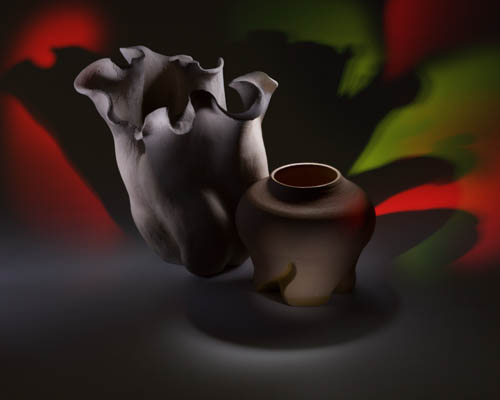
This image has a number of layers that are applied in Lighten or screen mode for a white light effect on the pottery. The background lights are from additional layers targeting RGB channels with reduced opacity for a more subtle colored effect.
These examples only scratch the surface of what is possible with this approach. The new method of generating false colors from multiple lighting directions offers much more control than my original technique. I might not have discovered this superior method if it hadn’t been for the bug introduced in Photoshop CC — this is the first time I have been happy with a bug!
My next Still Life Workshop will happen at the California Photo Festival where we will have multiple setups going within a large space. This will be a blast! The shooting session can be followed by a digital darkroom experience at Light Photographic – There are plenty of other reasons to attend the festival with over 170 sessions and 21, world-class instructors, including yours truly!
