Explore a New Creative Approach to Photo Abstracts
This post represents a departure from my usual material. My focus has been on enhancing the “straight” photograph, and although I am known as a photo-digital illustrator, I normally don’t write about special effects or other visual tricks. I have never written about Photo-Mandalas before, though I have been experimenting with this technique for quite a while, and I’ve used it extensively in my Tarot card series. The following technique allows you to generate symmetrical abstract compositions from any image. There are endless variations of this but I will outline only the most basic approach using the following image as a starting point.
I was intrigued by the arrow shape here, but by itself, the image is only mediocre. The main feature that makes this image suitable for a Photo-Mandala is the graphic simplicity and how the shadows form a frame at the right edge. I am defining a Photo-Mandala as a reflectively symmetrical composition that is generated from one or more “straight” photographs. There are a number of ways to proceed here, but in this case, I will start by creating a mirror-flip of the image.
Duplicate the Background to a new layer and then canvas out the document to be 200% wider – expanding to the left. Then flip the top layer horizontally so the image is still right-side up but is now a mirror of the underlying layer.
Use the Move Tool and drag the top layer while holding down the “Shift” key so that it drops into place on the left side of the expanded canvas.
This is already more interesting than the original. Sometimes this is as far as you need to go and certainly John Paul Capponigro has gotten a lot of mileage out of this simple step. I like to take this idea a bit further! Flatten and duplicate this mirror flip into a new layer, then flip vertical.
Now the whole image is upside down. The next step has many variations depending on what Blend Mode you select in the layer drop down. In this case I choose Lighter Color to create an interesting combined image that is a 4-way mirror!
Again, one could stop here and I suggest you save out all these intermediate steps because you can always return to change the blend modes later for additional variations. At this point, I often re-scale the image so that it is perfectly square as I feel that that contributes to the Mandala quality of the final composition. Flatten the image, enter the Image Size dialog and un-check the “Constrain Proportions” checkbox, then enter the same dimensions for height as you have for width.
Now, duplicate the Background again, but this time, rotate the top layer 90°…
Again playing with the layer Blend Mode results in many different variations! Here I will choose Overlay.
Things have transformed quite a bit and we are now getting pretty abstract. Many, many variations are possible with simple adjustments at any stage of the the process. A simple Shadows-Highlights move results in the following:
These Photo-Mandalas have an incredible amount of detail that suggests the possibility of very large prints! Look at this detail of the upper center portion of the image.
Use different Blend Modes to achieve entirely different looks – check out the Difference Blend Mode:
Detail of the very center:
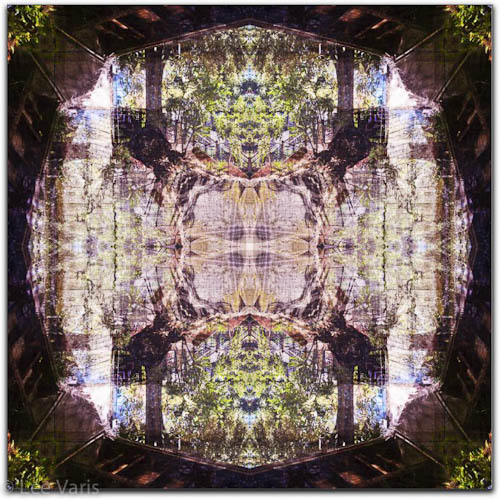
Here are a few examples of other Photo-Mandalas to give you some ideas – the original source photo is followed by the Photo-Mandala generation:
The Photo-Mandalas process is a lot of fun and can lead to surprising discoveries about your images. Sometimes the most banal images can be the source material for some really amazing Photo-Mandalas! Very often you will find that you can’t really appreciate these images until you make very large prints. I’m hoping to collect enough images like this for a show with large 36’x36′ prints on aluminum – any interested galleries please contact me!
You can see some more examples of my Photo-Mandalas on my Flickr page


Hey Lee,
Thanks for sharing this technique. Although I’ve never really considered to this style of work, I’m definitely having fun finding new possibilities for images.
Thanks for re-motivating me. I’ve used this technique in the past, but gave up on it for reasons I cannot explain. I had a little fun over the weekend by making Mandalas and posting them to my Flickr photostream. The comments have been underwhelming, which may be why I gave up on them in the first place. Regardless of what others think, these things are FUN to do. http://www.flickr.com/photos/delosj
Thank you for sharing this!