These days it is very popular for photographers to do all of their image enhancements in Lightroom, never once entering Photoshop. There are quite a few photographers entering the field who have never even opened Photoshop, and if it doesn’t work with simple sliders, they’re not interested. While it may be true that some images don’t require much in the way of post processing, I believe that most photographic images can be much better with just a little bit of post processing help! The question many are asking is, how necessary is Photoshop when we have all these amazing things we can do in Lightroom!
For me Lightroom is primarily an image management system and a workflow production tool. I don’t consider it a fine image editor. However, Lightroom can be a wonderful comping tool to help the photographer pre-visualize what enhancements will benefit an image.
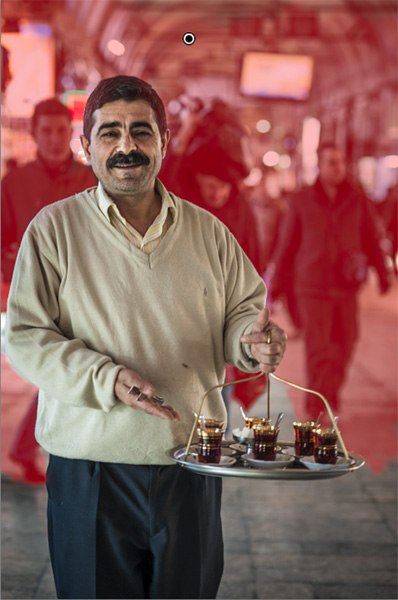
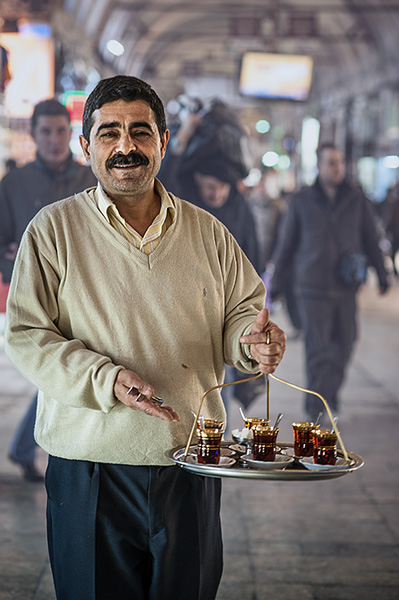
Here is a case in point: an image by Bobbi Lane, that I was working on to promote our upcoming travel tour to Turkey! Here is the raw image as captured by the camera:
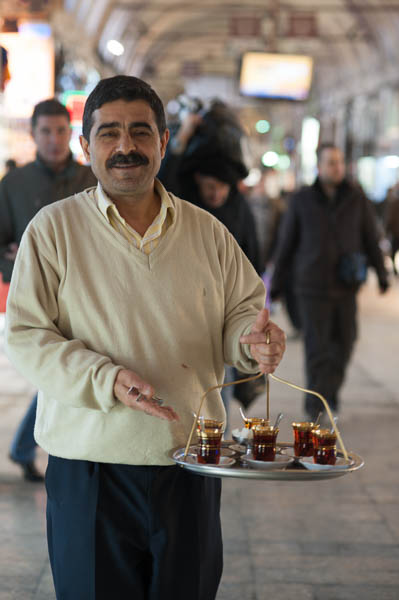
A Turkish “tea runner” supplies tea for shoppers at the Grand Bazaar in Istanbul.
Typical of Bobbi’s great travel portraits, this is a great shot of a man in his environment. The image shows a uniquely Turkish custom of free tea for shoppers, delivered in an elegant little tray. The nicely out of focus background places him in the public space with lovely natural light. Its is slightly underexposed, and so, with a few global contrast and brightness adjustments, along with some subtle local brightening of his face we arrive at this:
Over all brightness and contrast brings the man into relief.
At this point, I decide that what this image needs is a little more separation between the man and his background. Lightroom has a very handy local adjustment tool called the Adjustment Brush—this is accessed from the far right of the row of icons under the histogram, when you’re in the Develop Module:
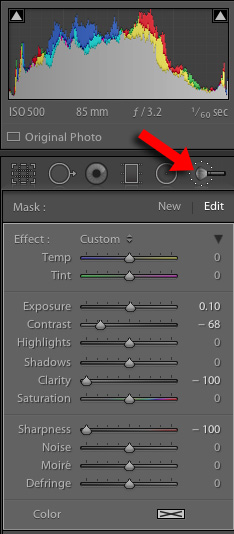
The Adjustment Brush was used to brush-in lower Contrast, negative Clarity, and negative Sharpness to suppress the background behind the man.
The settings shown here were brushed into the background behind the man, reducing the contrast and having the effect of pushing the background further away, making the man pop out from his background. To get the necessary precision around the outline of the man, the Auto Mask checkbox was utilized for the brush strokes around his figure:
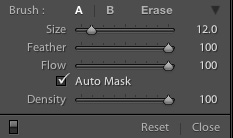
This section is right underneath the adjustment sliders for the tool.
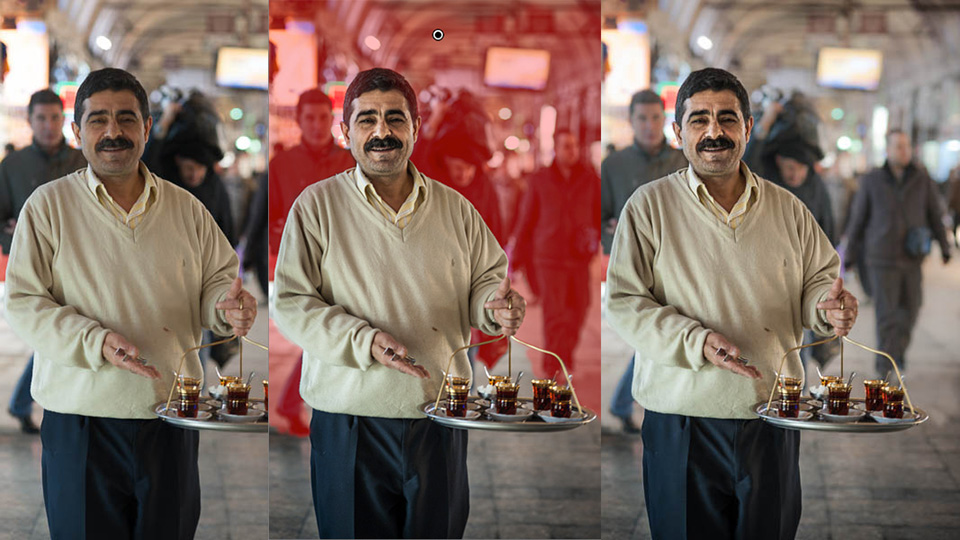
You can turn on “Show Mask Overlay” to help you visualize exactly what will be affected by the adjustment:

Check the little checkbox at the left below the image to show red where the image will be affected.
The red areas show where you’ve brushed in the adjustment
The result is just what I was looking for:

The man shows more separation from the background because he has much more contrast (lights and especially darks) than the area behind him.
This is a simple trick to create more of an illusion of depth in the image, and this was a very quick enhancement. Here it is again, side-by-side with the original:
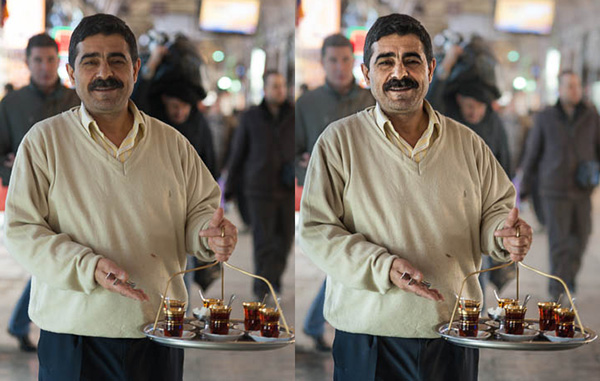
Compare with the original on the left
If I was only going to use this for a web page, it would be fine the way it is. However, it ALWAYS pays to zoom in to at least 1:1 to see if there are any artifacts:
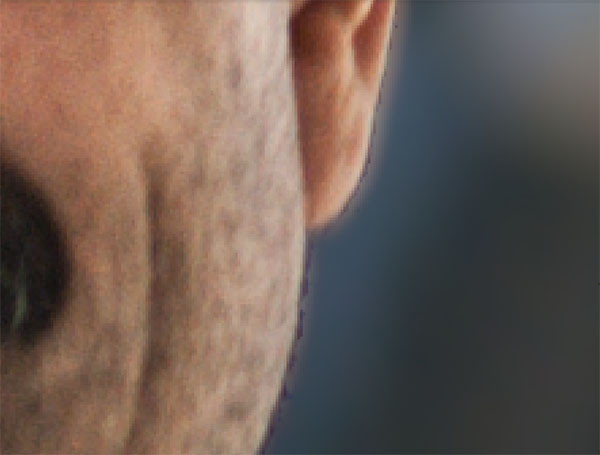
The edge of the Auto Masked Adjustment Brush shows nasty little artifacts.
Lightroom often sacrifices precision for convenience, and we have to be on guard for this sort of thing. So… In the end, as is often the case, the Lightroom adjustment can only be used to pre-visualize the direction I wanted to go in. The final image would still need to be done in Photoshop where I can create a much more precise, and invisible, mask.
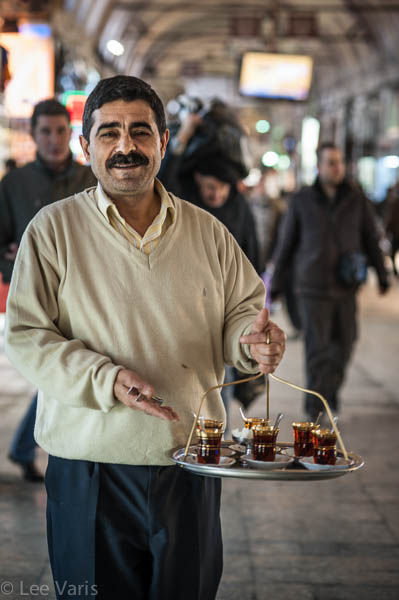
Here is the final Photoshop version:
The final has better sharpening, and the background has been hue-shifted cool to provide a little color contrast with the foreground subject.
The difference here on screen is subtle, but in a print it looks way better. The takeaway is that Lightroom is a quick way to pre-visualize an enhancement to see if it is going to work for a particular image. It helps me decide if an image is worth working on in Photoshop, and helps me decide what to do. I can always get a higher quality result using the more sophisticated masking and adjustment tools in Photoshop.
You can see another image worked up in both Lightroom and Photoshop in another blog post here: Adventure in Color and Tone
Bobbi and I are leading a photo tour to Turkey May 26th – June 7th, and I will be providing personal training in image enhancement techniques for your travel photos through the tour. Don’t miss the opportunity to capture spectacular images in an exotic, yet totally comfortable country—see Istanbul and the amazing rock cave city of Cappadocia, as well as other wonders, and come away with the best pictures of your life. See more details here: